Creating my own HoneyPot with T-Pot
System Requirments
For this project, i’ll be using a Virtual Private Server offered by the German cloud provider NetCup. You will learn how to install T-Pot, the all in one HoneyPot in this blog post.
My server has the following dimensions which are more than enough to satisfy the system requirments:
- RAM 8,192MiB (8GB)
- 4x CPU Cores of x86 Architecture
- 160 GiB Harddrive
Setting up our server
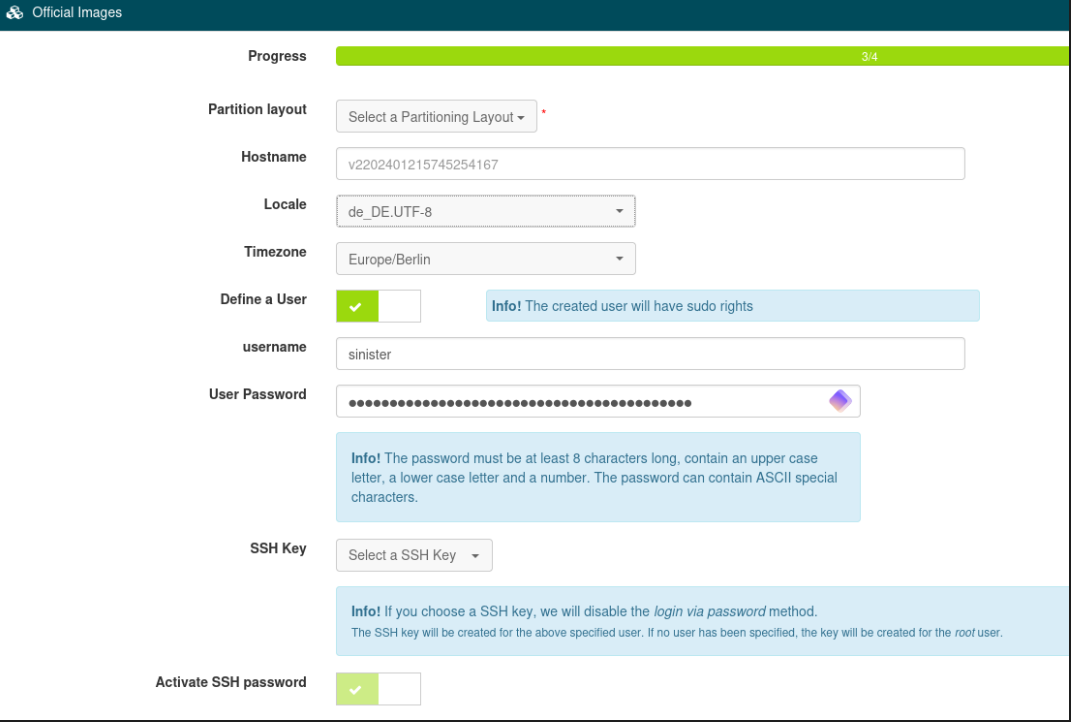
For the OS I choose Debian 12 with code name “Bookworm”. If you’re also using a VPS, I recommend choosing a SSH-Key instead of a username and password for authentication. Since the automatic SSH Deployment did not work, I first created a user which we will be using to copy our ssh key to server with.
After waiting a few minutes, the image is successfully deployed, and we can try connecting.

In order to access the system easily from my workstation, I’ve generated a fresh SSH Key to authenticate against the server and added it to the server using ssh-copy-id:
1 | #generate strong key, optionally add passphrase |

The command shows it executed properly, we should now be able to authenticate with our newly generated ssh-key.
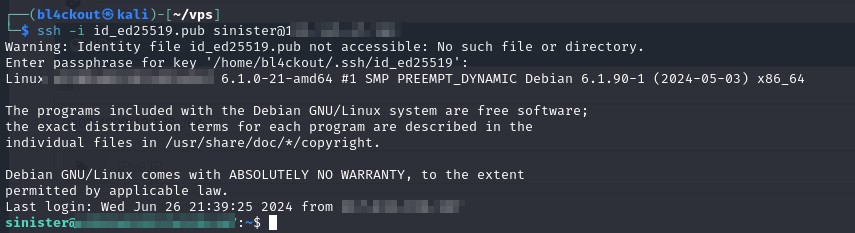
voilà! we get a shell and can now proceed with the installation of t-pot.
Setting up T-Pot
This is a fairly straight-forward process. We can clone the repository or create our own ISO File using makeiso.sh script from T-Pot’s GitHub. I choose the simplest method and just went the default installation that sets up a docker instance for the honeypot.
1 | #install git if not already installed |
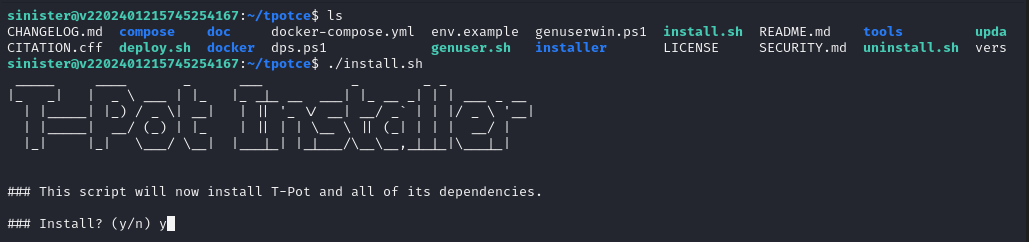
Install T-Pot as current user
1 | ./install.sh |
The installation will do the following which we have to keep in mind:
- Changes the SSH Port to tcp/64295, since we want to use ssh’s standardized port 22 as a honeypot
- Disable the DNS Stub Listener to avoid port conflicts with honeypots
- Set the firewall target for the public zone to ACCEPT
- Add Docker’s repository and install Docker
- Add the current user to the docker group
- Add and enable
tpot.serviceto/etc/systemd/systemso T-Pot can automatically start and stop
When prompted for the type, I went with the Full Hive (option h) - this will require the most resources but will include all features.
If you’re unsure what to go for it might be sensible to check t-pot’s system requirments
Once the installer is finished we need to reboot the machine and access it on port 64295 using ssh:
Optional: Opt-Out from submitting data to Telekoms Sicherheitstacho
1 | #stop t-pot |
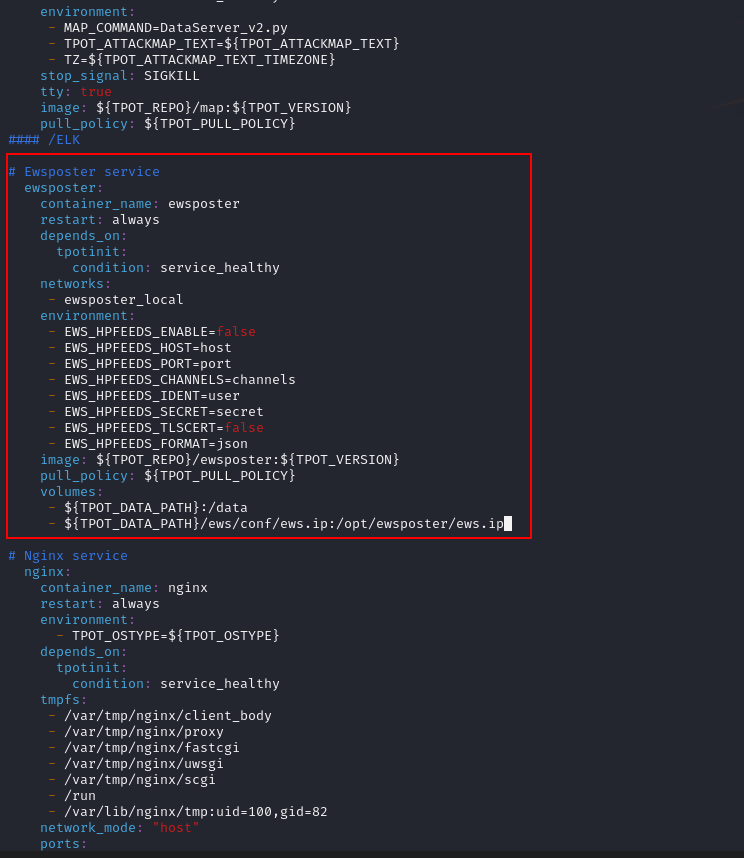
Remove the Ewsposter section to remove Telemetry
Now that we verified ssh login works, we can check out our main form of administration using the Web-server created by T-Pot
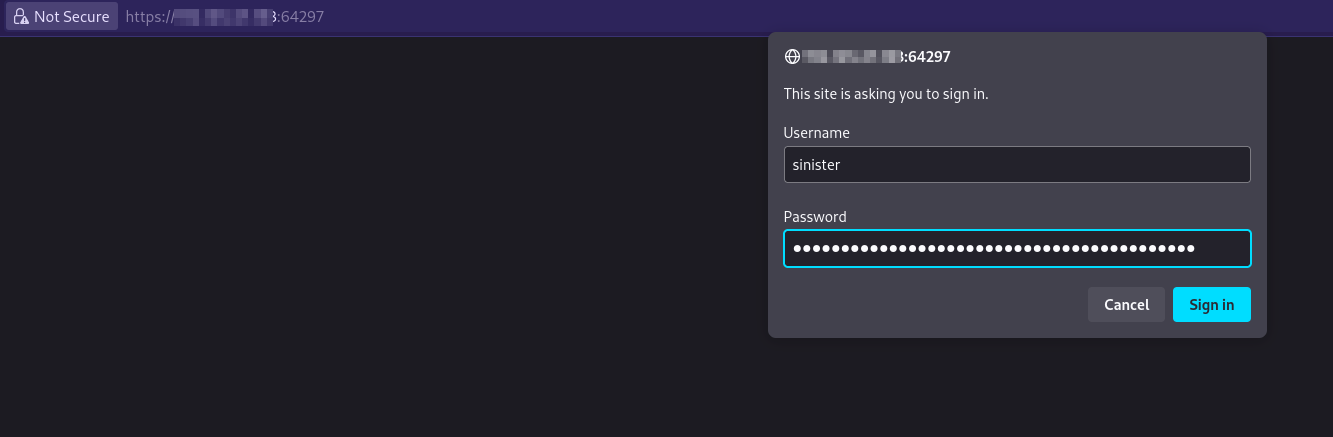
1 | https://vps_public_ip>:64297 |
Since we do not have a officially signed certificate, we will have to click through the warning that the webserver is not secure and proceed to log in using the defined user during the installation of t-pot
We are now greeted by t-Pots interface and can navigate to the Attack Map or the Kibana Dashboard where we are able to view the specific attacks that are happening on our honeypots
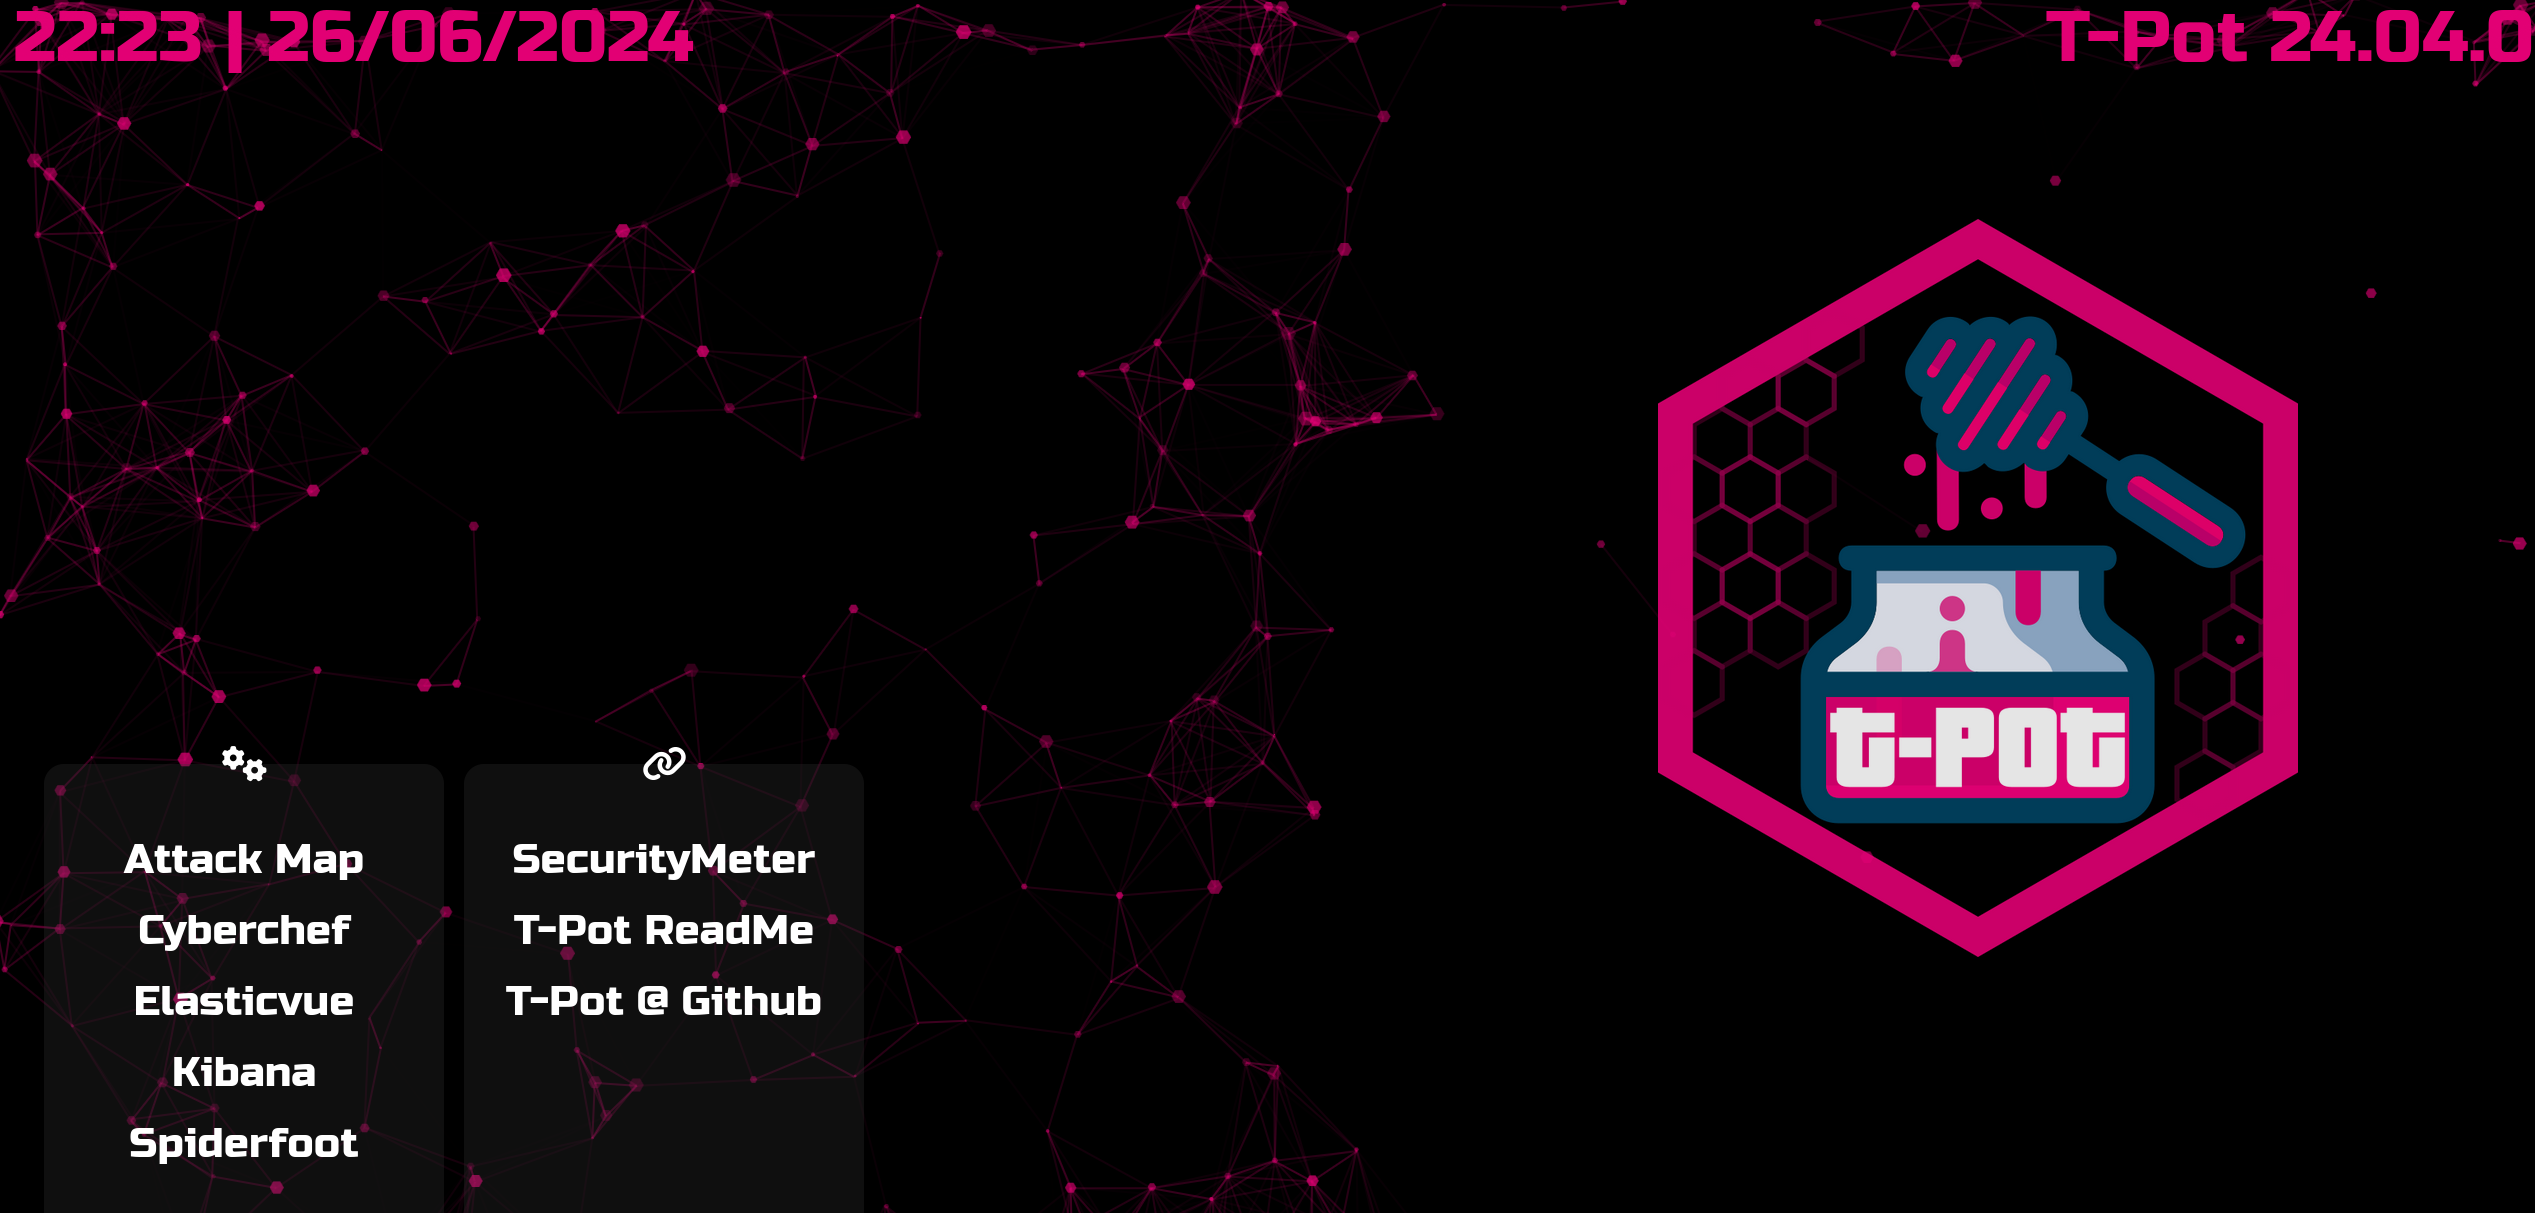
Great, we now completed the installation of t-pot. In the following sections, I will go into depth on what kind of honeypots are now set up and how to play around with the data.
Overview of the Dashboards
Kibana
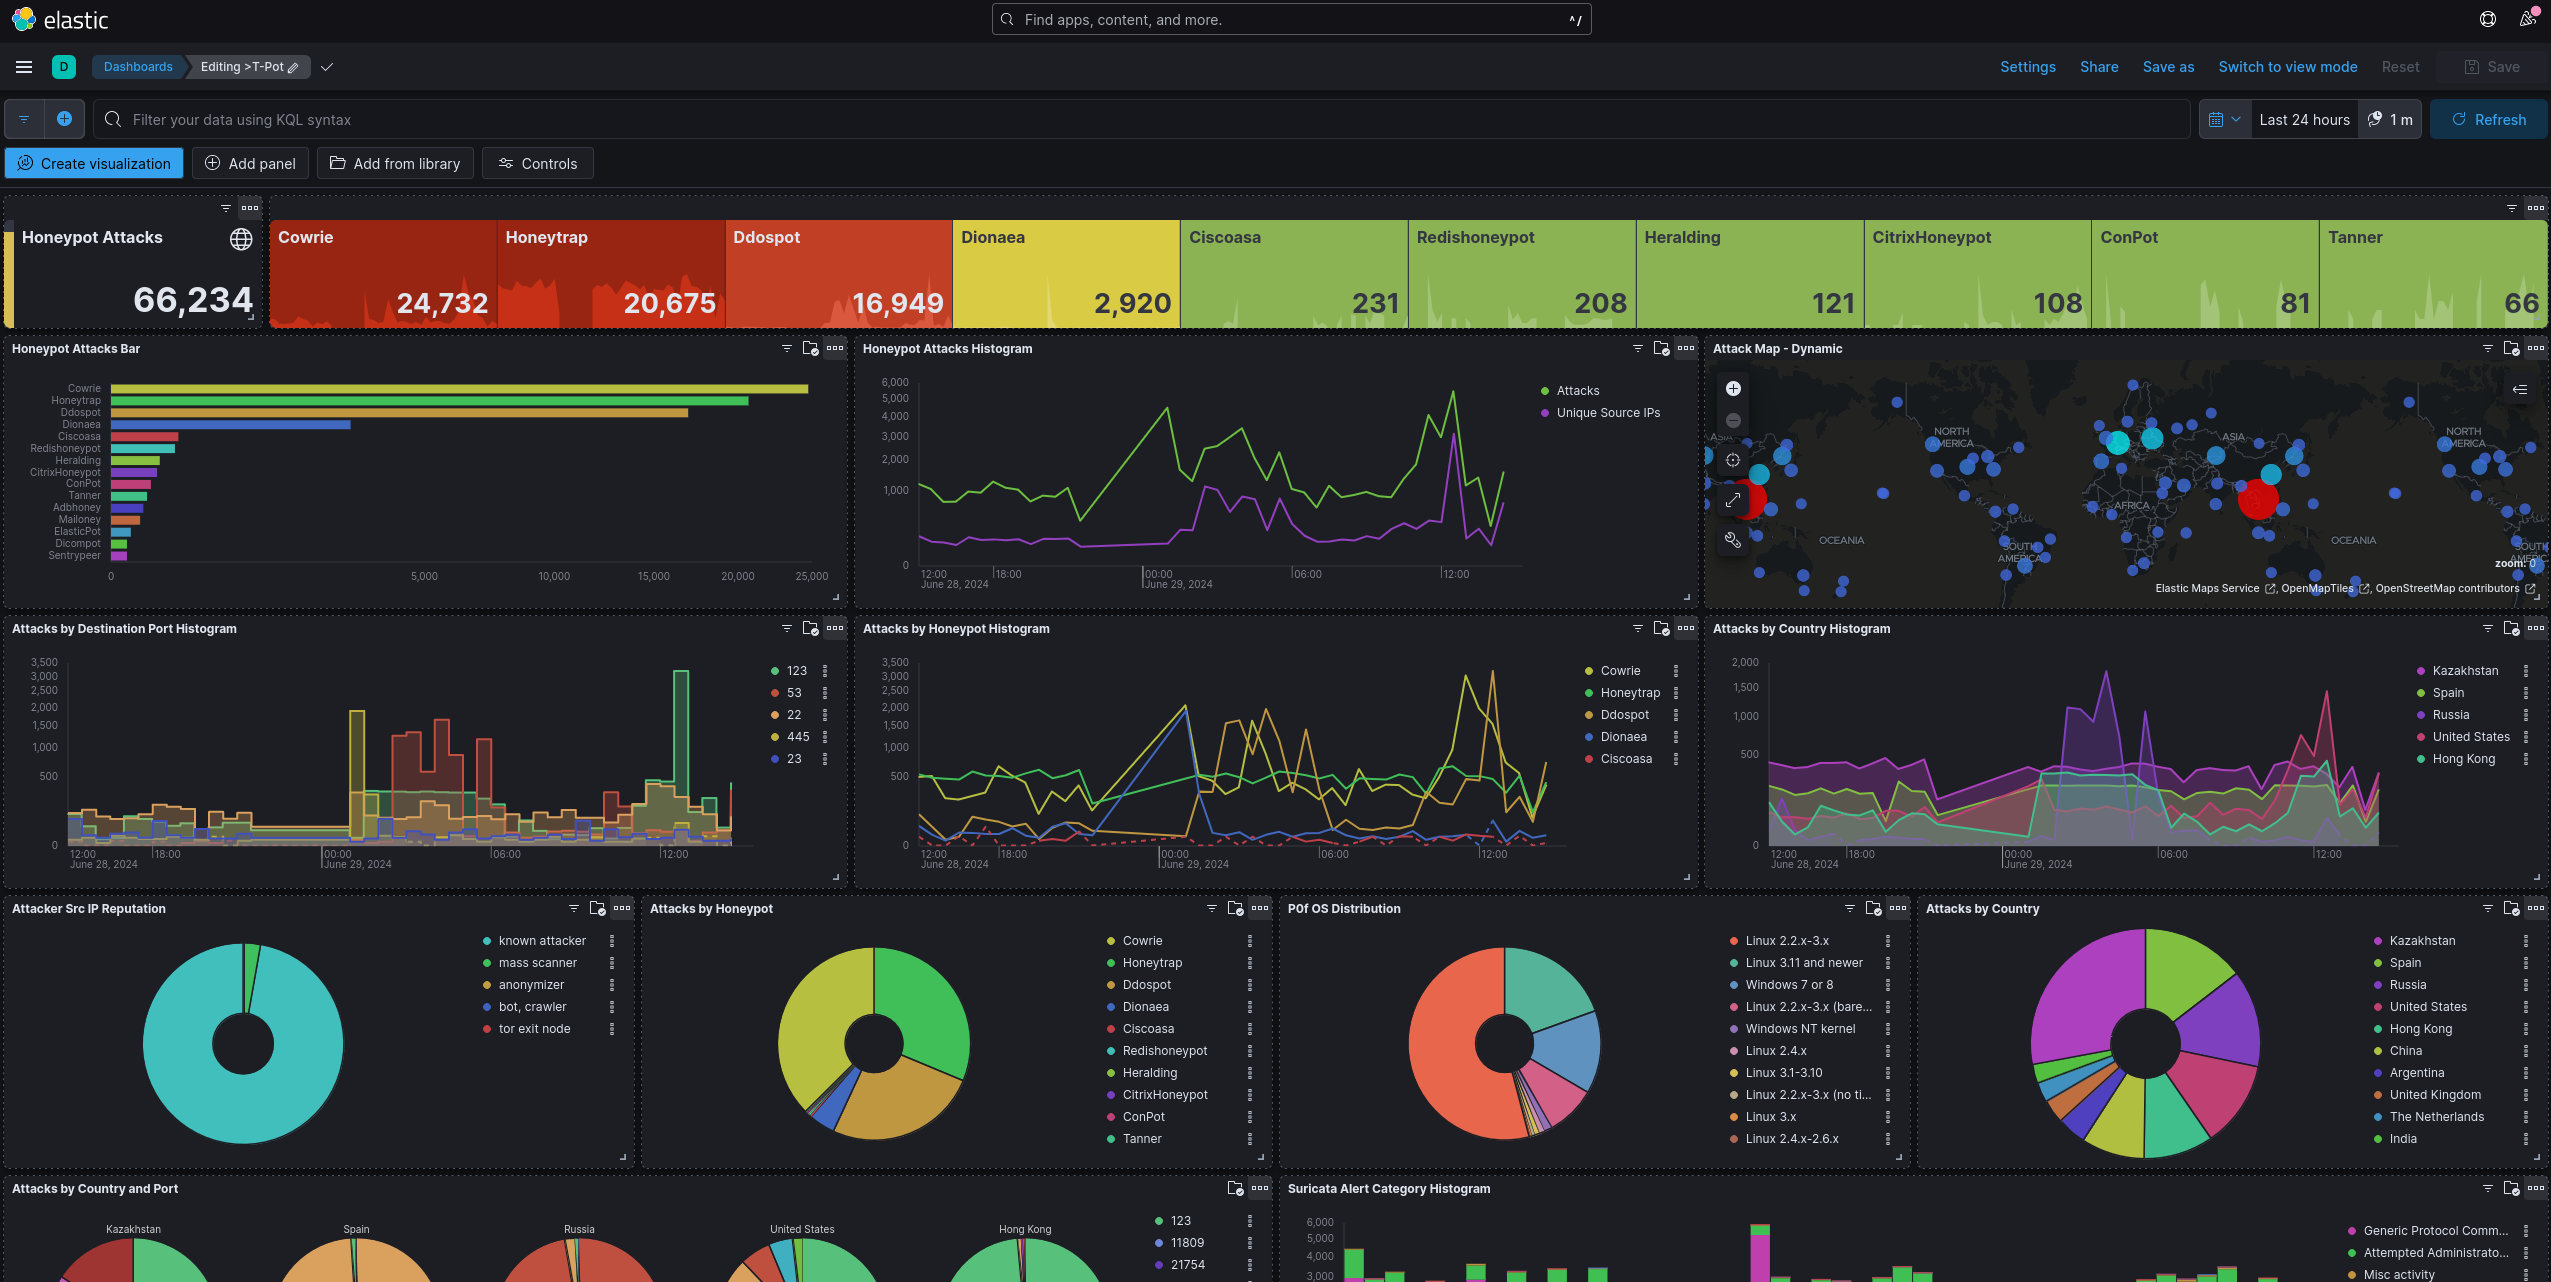
On the landing page, we can choose the Kibana Dashboard witch is pretty cool, we can review each HoneyPot in detail and how exactly its being attacked.

For example, we can look at the entirety of the T-Pot Honeypots which we deployed. After around two Days of running it, we have a total of 66,234 attacks. For this reason, I also suggest lowering the amount of logs that we store to a period of 7 Days instead of 30 Days.
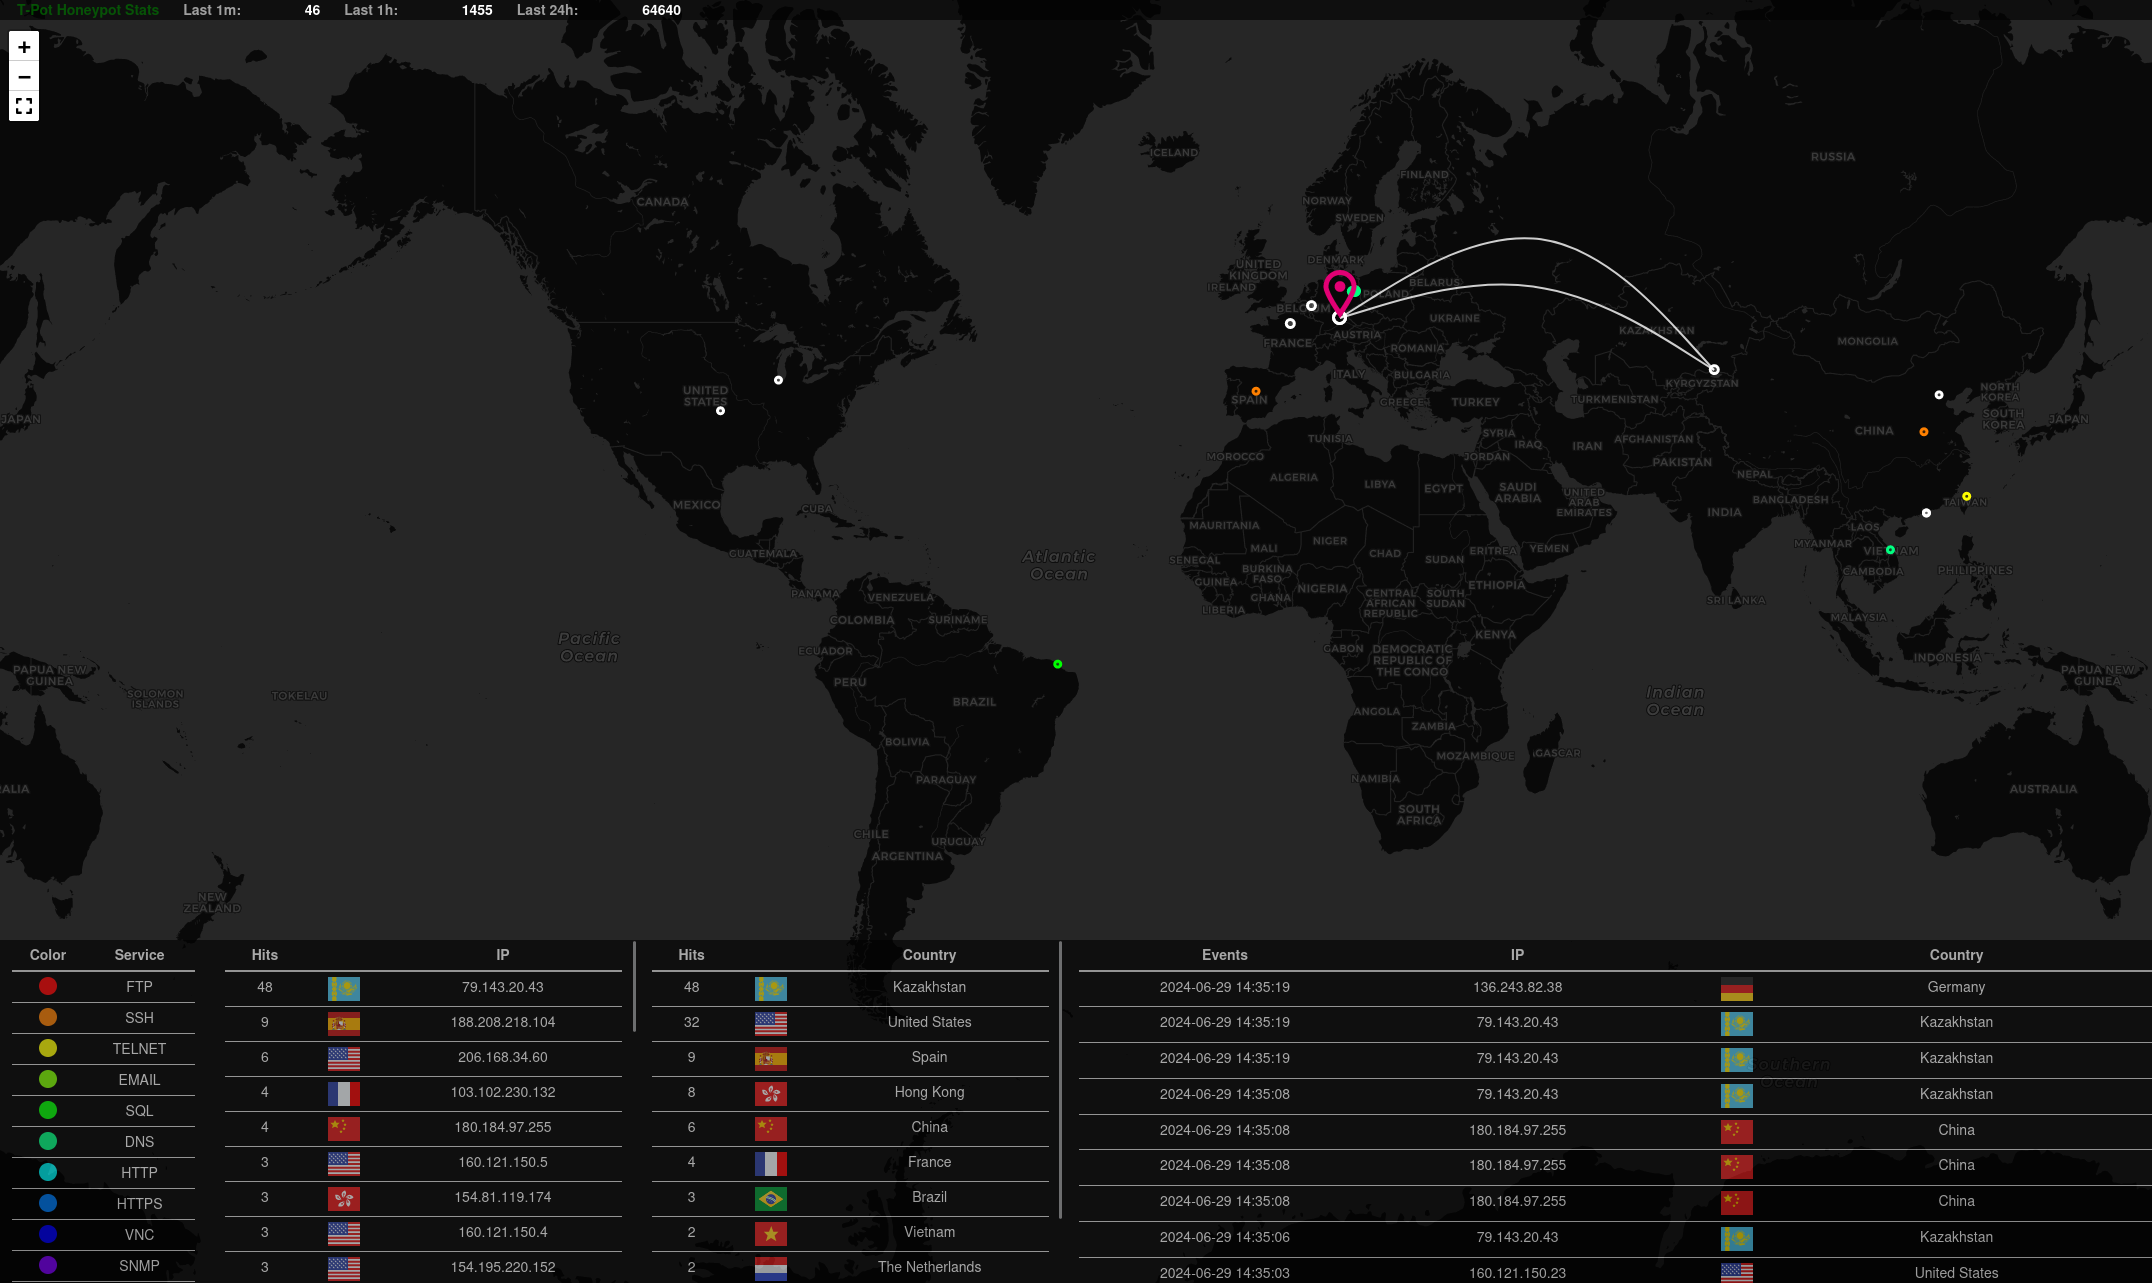
Attack Map
The Attack Map is a live Dashboard of our HoneyPot and how it’s being attacked from the globe. The marked Dots indicate known malicious adversaries that automatically try to compromise systems in the wild, you can gain a little intel by hovering over them.
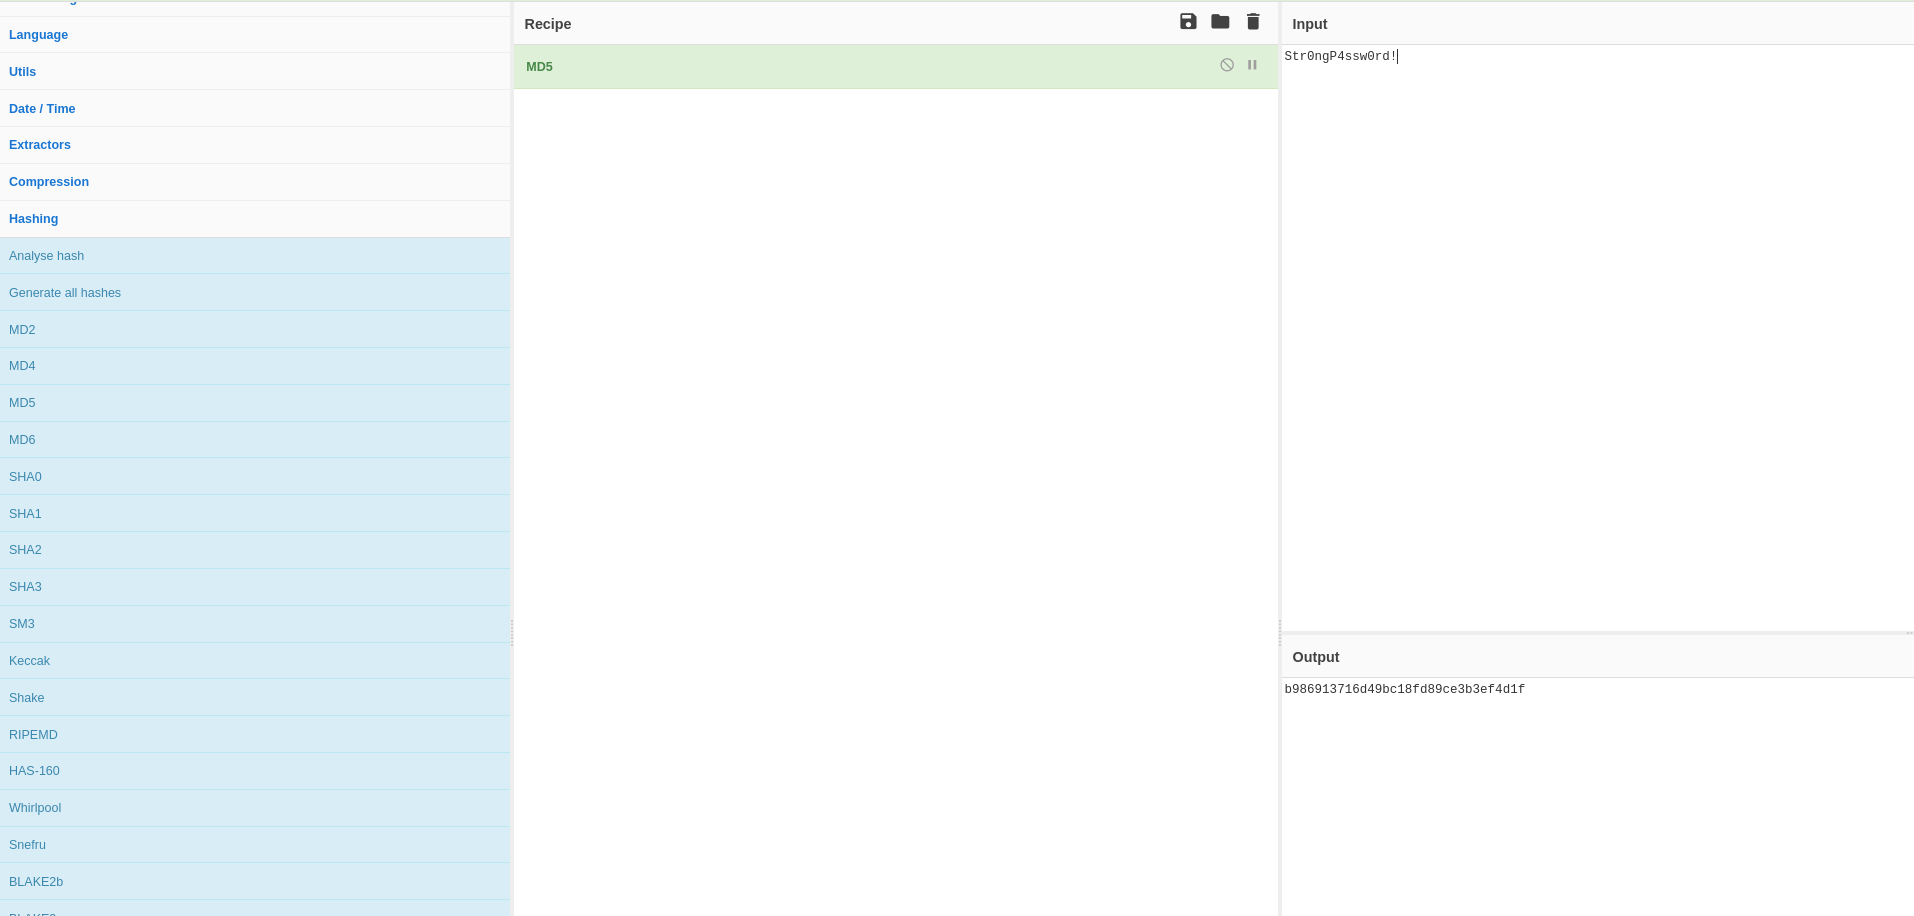
CyberChef
Cyberchef is a simple, intuitive web app for analyzing and decoding data without having to deal with complex tools or programming languages. You can “BAKE” recipes and reuse them
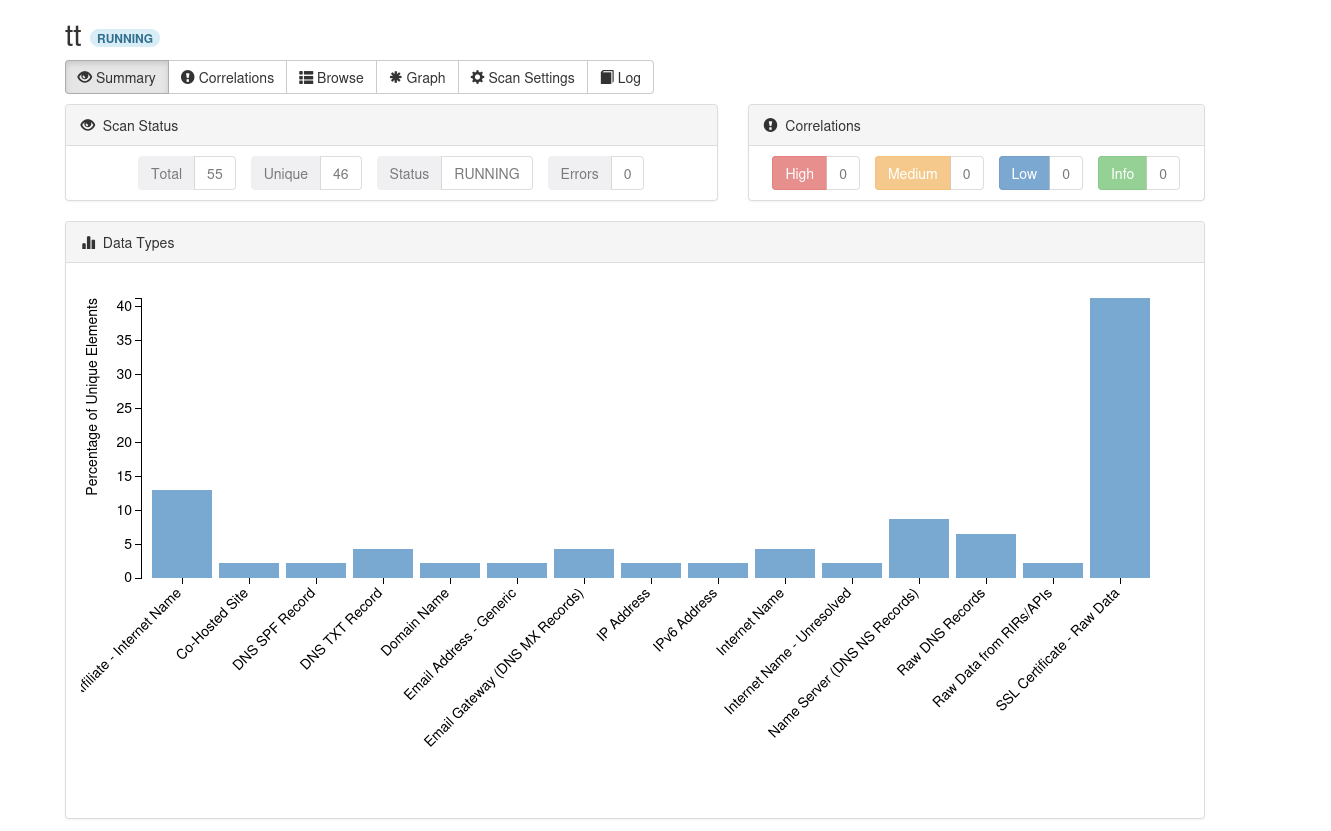
SpiderFoot
SpiderFoot is an automated OSINT Tool that allows you to scan domains, IP adresses, hostnames, entire subnets and much more from within your newly setup VPS.
There’s different types of scans:
Get anything and everything about the target; ALL
Understand what information this target exposes to the Internet; Footprinting
Best for when you suspect the target to be malicious but need more information; Investigation
When you don’t want the target to even suspect they are being investigated; Passive
Depending on the target, SpiderFoot can scrape lot’s of data and provide you with valuable information like the email address format that the corporation uses. This can be quiet neat in engagements.
Keep in mind that scanning a target only should be done in a ethical manner and not without permission, since public scanning is forbidden in certain countries.